
DIY Glitter Seashell Christmas Ornaments

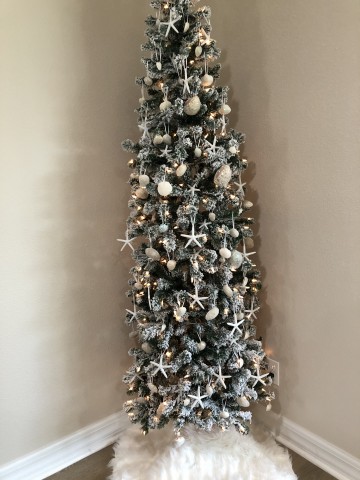
It is so easy to make your own Glitter Seashell Christmas Ornaments! I made these ornaments for my own Coastal Christmas themed Christmas tree and in this blog post I will show you how I did it.
Gather required items
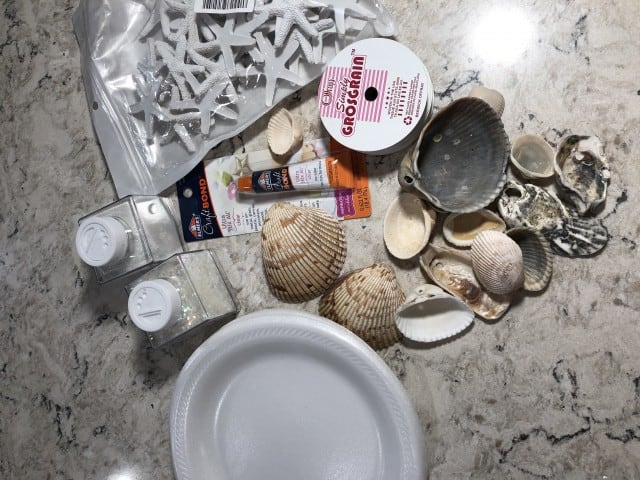
- Seashells with holes in them
- Clear glue
- White 1/8 inch ribbon
- Large sewing needle
- Styrofoam plates or bowls
- Extra fine glitter
- Clean and dry small sponge
- Small starfish (optional)
- Large starfish (optional)
Put holes in your seashells if they don’t already have them
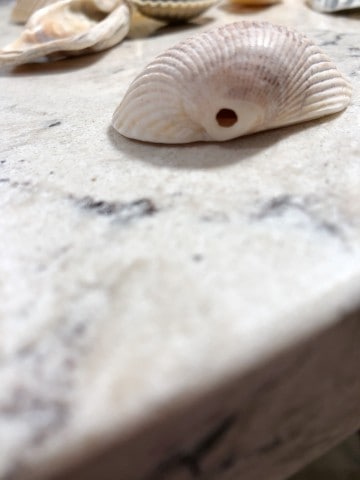
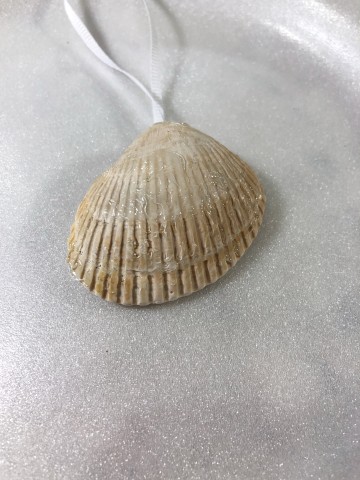
Whenever I walk on the beach, I just can’t resist collecting seashells. Sometimes I tell myself that I’m definitely not going to bring any shells home this time and I leave my seashell bag at home. Inevitably, I end up collecting shells and putting them in the pockets of my shorts instead. It seems I just cant resist these little beach treasures. Very often, I find shells with holes in them. When we first moved to Florida I started collecting these shells, determined to do something creative with them. Well, just a couple of weeks it came to me – Christmas tree ornaments! If your seashells don’t have holes in them, you can drill holes into them, or if you are like me and don’t particularly enjoy using a drill, ask someone else to do it.
Cut ribbon and tie it to the seashell
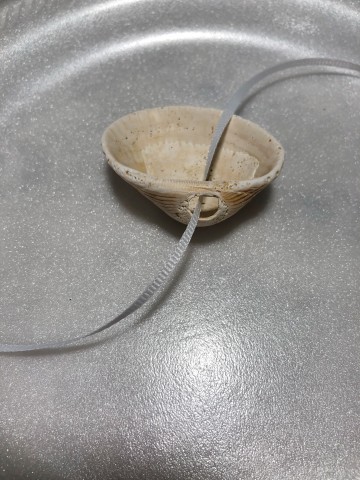
I cut my ribbon to 8 inches. Slide the ribbon through the seashell, knot it, and then pull the knot tight close to the end of the ribbon. I suggest starting with 8 inches and then hang your shell on the tree to see if you like the length of the string. If not, shorten or lengthen the string accordingly.
Poke ribbon through seashell with a needle if necessary
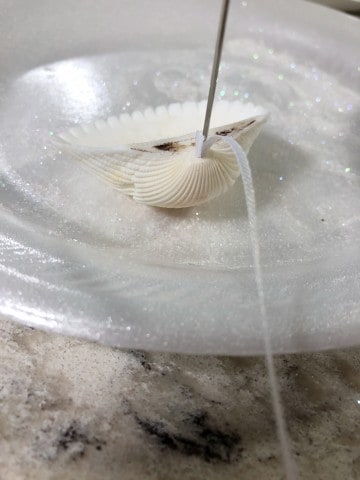
I found that some of the holes in the seashell were too small to easily slide the ribbon through. In that case, I found it useful to use a large blunt sewing needle to push the ribbon through the hold.
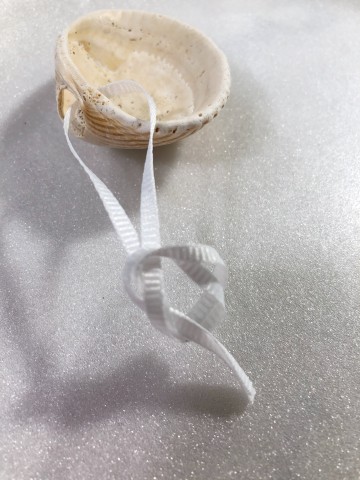
Tuck knot back up behind seashell and apply glue
So you don’t see the know on the Christmas tree, slide the knot up and into the seashell so the shell hides the knot from view. Squirt glue onto the shell and then spread it evenly with the corner of your sponge.
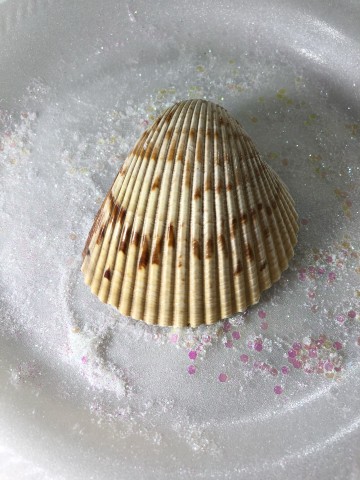
Roll shell through the glitter and set aside to dry
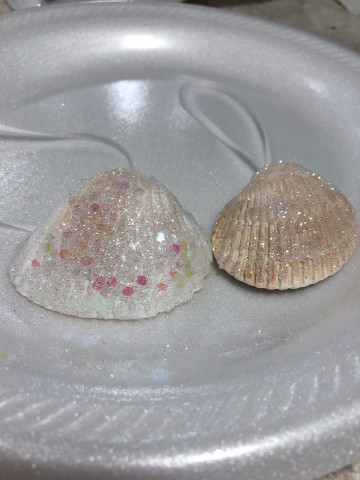
Sprinkle some glitter onto a plate or bowl. I used styrofoam plates for the glitter, but styrofoam bowls might be better for rolling the shells in the glitter. Use a different plate for each color of glitter, unless you intention is to combine two kinds of glitter. There are so many colors of glitter. Be creative and have fun! I used extra fine white glitter on one plate and iridescent glitter flakes on another. Sometimes I mixed the two and sometimes I just used the fine white glitter on the seashells. If you have children at home (or grandchildren visiting!) this would be a fun thing to do with the kids. After rolling the shell through the glitter, set it aside to dry. I placed mine on more styrofoam plates but you could just set your seashells on paper towels to dry. Mine were totally dry in less than an hour and ready to be hung on the Christmas tree. When transferring the shell from the glitter to the drying area, try to hold onto the ribbon as much as possible to avoid wiping glitter off of the shells with your fingers.
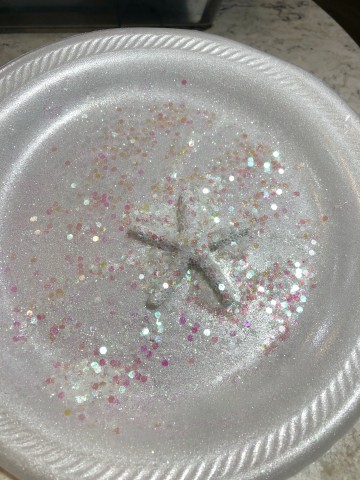
I also bought some resin starfish to add to my tree. The small ones do not have a hole in them and I like just tucking them into the tree after applying glitter. The large starfish are particularly nice and come with holes already drilled in them. They also come with twine for hanging the starfish. You will definitely need the big needle to poke the twine through the holes. Personally, I wanted a little more elegant effect and I used the same white ribbon on the starfish that I used on the seashells. Again, you will need a large needle to poke the ribbon through the hole at the top of the starfish.
Don’t be afraid to use “ugly” seashells
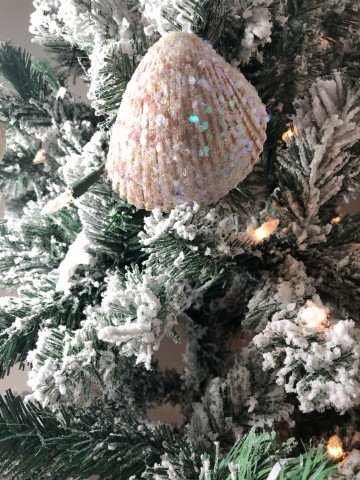
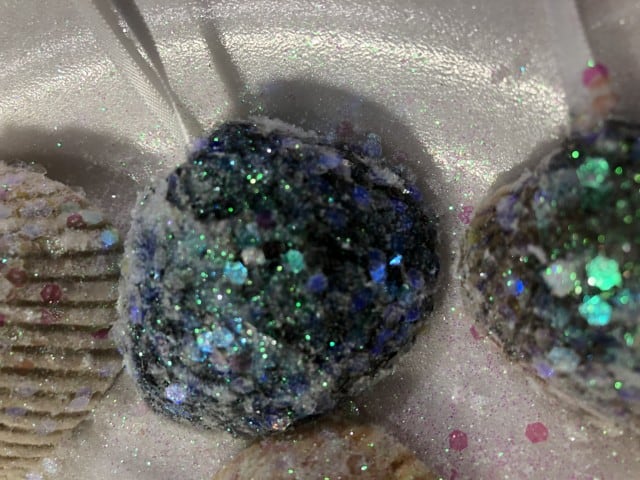
When I first started my project I envisioned using only bright white seashells. The problem was that many of my shells that already had holes in them were a variety of shades of brown and grey. I was too lazy to drill holes through more white shells so I thought I would give the brown and grey seashells a try. I was really pleased with the results! The brown seashells took on a creamy appearance while the grey seashells looked blueish green. What a fun surprise! I loved the results! My favorites, though, are still probably the bright white seashells with white extra fine glitter. They look as if they have sugar sprinkled on them. Have fun!


I love your ornaments !! Thank you